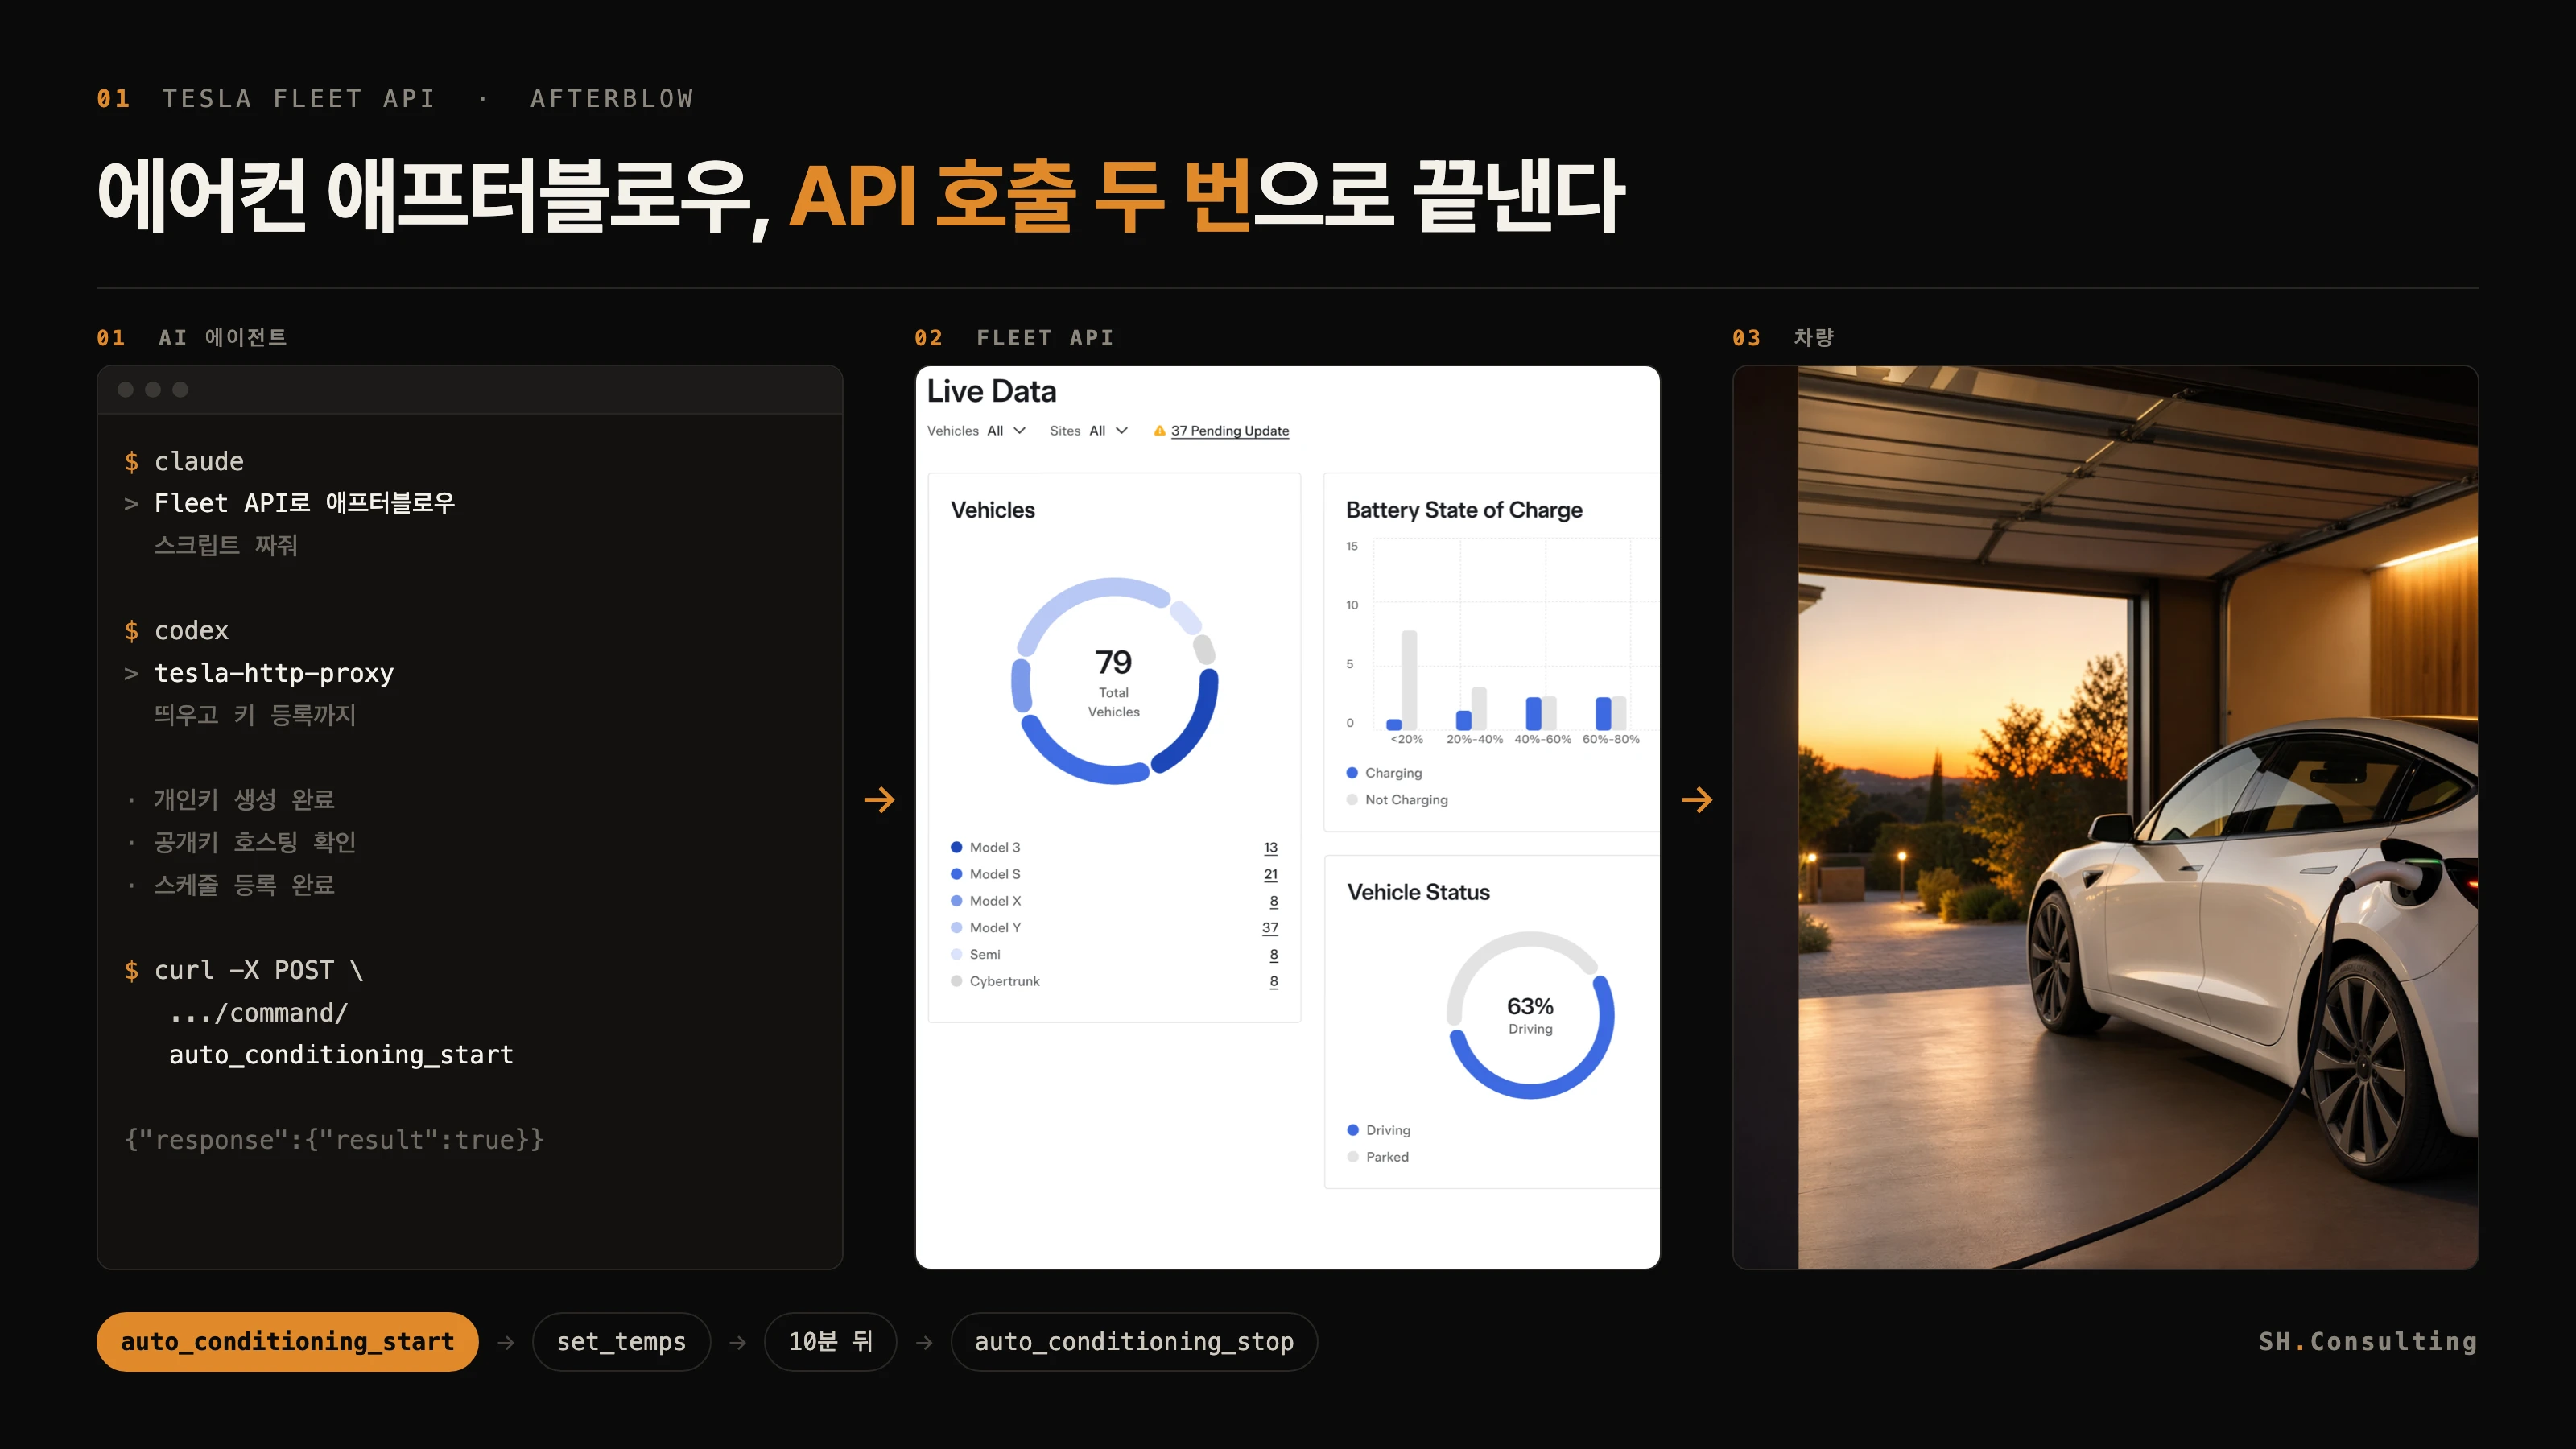
What it means to control a Tesla with code
An API is the channel a program uses to talk to a service instead of a human tapping an app. Tesla offers that channel officially as the Fleet API. The actions you tap in the app — lock, climate on, start charging — are exposed as command names, and calling a name moves the actual car.
Unofficial APIs reverse engineered from the Tesla app used to be common, but there is a proper route now. The owner signs in with their Tesla account and delegates permission to a specific app (OAuth), and that app sends commands on the owner's behalf. That is what "connect your Tesla account" means on any third-party service.
Recent vehicles add one more layer. Commands must be signed, and the public key used to verify that signature has to be enrolled on the car by the owner. This is called a virtual key. It can be removed from the car's Locks screen at any time, so revocation stays in the owner's hands.
So there are three layers: account delegation (OAuth), a public key enrolled on the car (virtual key), and your own server signing commands with the matching private key. Once those exist, the rest is ordinary HTTP.
What is exposed, and what is not
The exposed surface is wider than people expect. The table below groups names that actually exist in Tesla's own command proxy implementation (teslamotors/vehicle-command).
What is not exposed is equally clear. Steering and acceleration, Autopilot and FSD engagement, Smart Summon, camera footage and sentry clips are all absent. Doors go as far as unlocking, not physically opening. So the honest description is not "AI drives your car" but "AI presses the repetitive buttons around your car".
One more thing: a sleeping car will not take a command immediately. You wake it with wake_up first, and that call is expensive (see the cost section). Rather than polling for state, streaming signals from the car through Fleet Telemetry is both cheaper and faster.
| Group | Command names (partial) |
|---|---|
| Climate | auto_conditioning_start · auto_conditioning_stop · set_temps · set_climate_keeper_mode · set_preconditioning_max · remote_seat_heater_request |
| Doors & storage | door_lock · door_unlock · actuate_trunk(front/rear) · charge_port_door_open · window_control(vent/close) |
| Charging | charge_start · charge_stop · set_charge_limit · set_charging_amps · add_charge_schedule · add_precondition_schedule |
| Security & modes | set_sentry_mode · set_valet_mode · guest_mode · speed_limit_activate · parental_controls_activate · set_pin_to_drive |
| Convenience | navigation_request · trigger_homelink · flash_lights · honk_horn · set_vehicle_name · schedule_software_update · wake_up |
Why afterblow is a good first automation
Afterblow means running the climate system briefly after you park so the evaporator dries. While cooling, moisture from the air keeps condensing on that surface; if it stays wet, mold grows and comes back as a sour smell the next time you switch the air conditioning on. That is why replacing the cabin filter so often fails to fix the smell.
Tesla's menu has no afterblow entry. So a service exists that builds exactly this one feature and sells it monthly — connect your Tesla account to a Telegram bot and it runs both passive drying and warm-air drying for you, starting around a thousand won a month after a fourteen-day trial (pricing as listed on sla-ai-bot.smartstream.kr).
It makes a good first automation for three reasons. It needs only two or three commands, so failure is harmless. The result is verified by your nose rather than by log files. And the auth, signing and scheduling structure you build here is reused unchanged for charging windows, pre-departure warming, or auto-locking after parking.
Setup 1 — register the app and host your public key
Start by registering an application at developer.tesla.com. You need this even if you only ever control your own car. Registration gives you a client ID and secret, and you choose the scopes the app will request (climate, charging, locks and so on).
The step that trips up beginners is the domain requirement. Each app registers one domain you own, and you must host your public key at a fixed path under it: /.well-known/appspecific/com.tesla.3p.public-key.pem. Tesla fetches the key from that address itself, so it has to be reachable on the internet, not a local file.
Generate the key as EC (prime256v1). The private key stays on your server and is never published; only the public key goes to that URL. Anyone holding the private key can command your car, so decide where it lives and who can read it before you start.
Finally the owner enrolls the key on the vehicle. Opening https://tesla.com/_ak/<your-domain> on a phone launches the Tesla app, and approving it adds the key to the car. The vehicle has to be online at that moment. Removing it later is one tap on the car's Locks screen.
# 1) Private key (EC prime256v1) — keep it on your server only
openssl ecparam -name prime256v1 -genkey -noout -out private-key.pem

# 2) Derive the public key
openssl ec -in private-key.pem -pubout -out public-key.pem

# 3) Host it at the fixed path on your domain (the path is not configurable)
#    https://<your-domain>/.well-known/appspecific/com.tesla.3p.public-key.pem

# 4) Verify it is reachable
curl -s https://<your-domain>/.well-known/appspecific/com.tesla.3p.public-key.pem

# 5) The owner opens this link on a phone to enroll the key on the car
#    https://tesla.com/_ak/<your-domain>
Setup 2 — run the command signing proxy
Recent vehicles only accept signed commands, and you do not have to implement signing yourself. Tesla publishes tesla-http-proxy as open source: run it on your server and it takes an ordinary HTTP request, signs it with your private key and forwards it to the car. Your own code stays as simple as one curl call.
Install it with Go or pull the Docker image. Four tools come with it. tesla-keygen creates the command authentication private key and stores it in the system keyring, tesla-auth-token stores your OAuth token, tesla-control sends commands straight from the terminal for testing, and tesla-http-proxy is the REST proxy you want here.
The proxy itself serves over TLS, so you pass it a certificate and key for its own listener plus the private key file used to sign vehicle commands. With a self-signed certificate, point curl at it with --cacert.
Then flash the lights as a smoke test. When it fails, the cause is almost always one of three: the car is asleep and needs waking, the virtual key is not enrolled yet, or the token scope is missing that capability.
# Install (either one)
go install github.com/teslamotors/vehicle-command/cmd/...@latest   # Go 1.23+
docker pull tesla/vehicle-command:latest                            # Docker

# Names for the key and token, plus your VIN
export TESLA_KEY_NAME=$(whoami)
export TESLA_TOKEN_NAME=$(whoami)
export TESLA_CACHE_FILE=~/.tesla-cache.json
export TESLA_VIN=<your VIN>

# Create the command authentication key (public key goes to stdout)
tesla-keygen create > public_key.pem

# Run the REST proxy on port 4443
tesla-http-proxy -tls-key config/tls-key.pem -cert config/tls-cert.pem \
-key-file config/fleet-key.pem -port 4443curl --cacert cert.pem \
--header "Authorization: Bearer $TESLA_AUTH_TOKEN" \
--data '{}' \
"https://localhost:4443/api/1/vehicles/$TESLA_VIN/command/flash_lights"Writing the afterblow script
Afterblow is three commands. Turn the climate on (auto_conditioning_start), raise the temperature (set_temps), and turn it off after a fixed interval (auto_conditioning_stop). The temperature matters: warm air, not cold, is what actually dries the evaporator.
Ten minutes is plenty. Run it too long and the climate keeps drawing from the battery in a parking garage. Start at five minutes, check whether the smell goes away, and extend from there.
There are two ways to trigger it. The simple one, when you roughly know when you park, is a scheduler — cron or launchd on macOS. The precise one is Fleet Telemetry streaming: subscribe to the parked signal and call the script when the car actually parks. Polling for state is the option to avoid, because of wake cost.
The script below is a minimal version assuming the proxy is already running. Change the hard-coded values for your setup and it runs as is.
#!/bin/bash
set -euo pipefail

PROXY="https://localhost:4443/api/1/vehicles/$TESLA_VIN/command"
AUTH="Authorization: Bearer $TESLA_AUTH_TOKEN"
CA="--cacert cert.pem"
DRY_MIN=10                     # drying time in minutes

send() {  # send <command> <json body>
  curl -s $CA --header "$AUTH" --header "Content-Type: application/json" \
       --data "$2" "$PROXY/$1"
  echo
}

# Wake only when needed — this call is expensive
send wake_up '{}'
sleep 5

# 1) climate on  2) both temperatures to the top
send auto_conditioning_start '{}'
send set_temps '{"driver_temp": 28, "passenger_temp": 28}'

# 3) wait, then stop
sleep $((DRY_MIN * 60))
send auto_conditioning_stop '{}'# Weekdays at 19:10
10 19 * * 1-5 /Users/me/tesla/afterblow.sh >> /tmp/afterblow.log 2>&1Cost — effectively free for personal use, with two traps
Fleet API has been usage-billed since January 2025. Every account receives a ten dollar monthly credit, and one or two cars of personal automation stay inside it. Tesla's own example covers two vehicles with streaming, a hundred commands and two wakes a day. Afterblow uses three or four commands a day, so there is room to spare.
The first trap is the payment method. Even inside the credit, an app with no payment method configured is disabled automatically, and each account starts with a billing limit of zero that only rises once a payment method exists. The flip side is useful: set a low limit (one to five dollars) and a runaway loop cannot produce a shocking bill.
The second trap is polling. Commands are cheap, but waking a sleeping car and repeatedly reading vehicle state over REST are not. A loop that checks state every minute drains the credit in days. When you need state, stream it through Fleet Telemetry instead.
| Item | Rough figure | Watch out |
|---|---|---|
| Monthly credit | 10 dollars per account | Covers personal automation for one or two cars |
| Commands | 1 dollar per 1,000 | Rounded to the cent (1,211 commands = 1.21 dollars) |
| Wake | About 20x a command | Call only when needed; never inside a loop |
| Vehicle data polling | Among the priciest | Replace with Fleet Telemetry streaming |
| Payment method | App disabled if missing | Set a low billing limit as a guard |
What to hand to an AI coding agent
If this reads like a lot of steps, that impression is correct. The hard part is not the code but the surrounding registration, authentication and signing — which is precisely what agents like Claude Code or Codex are good at, because it is a loop of reading docs, running a command, and choosing the next step from the result.
Instruct in verifiable conditions rather than goals. "Build me Tesla automation" produces worse results than "check that the public key returns 200 at this URL, bring the proxy up on port 4443, and show me flash_lights succeeding". Each step is something a human can confirm by eye.
One caution: keep private keys and access tokens out of the terminal output and the repository from the start. Give the agent the key path but tell it never to print the contents, and create the environment variables and .gitignore before any work begins.
1. Read the README at https://github.com/teslamotors/vehicle-command and install it.
2. Create an EC (prime256v1) key pair with openssl. Keep the private key under
   ~/.tesla/ and never print its contents — report only the path.
3. Copy the public key to public/.well-known/appspecific/com.tesla.3p.public-key.pem,
   deploy, and verify with curl that the URL returns 200.
4. Run tesla-http-proxy on port 4443 and show flash_lights succeeding. If it fails,
   determine whether the cause is wake, virtual key, or scope.
5. Finally write afterblow.sh and register it in crontab for weekdays at 19:10.
   Keep the token and key in .env and add it to .gitignore.
Checklist
One, register the app at developer.tesla.com and pick the scopes. Two, create the EC key pair and host the public key at /.well-known/appspecific/com.tesla.3p.public-key.pem on your domain. Three, enroll the virtual key on the car through https://tesla.com/_ak/<your-domain> while the car is online.
Four, run tesla-http-proxy and confirm the connection with flash_lights. Five, write afterblow.sh with auto_conditioning_start, set_temps, a wait, then auto_conditioning_stop. Six, schedule it and configure a payment method with a low billing limit.
That is your first automation. Charging windows, pre-departure warming and auto-locking sit on the same structure with different command names. Driving control and FSD, on the other hand, are not reachable down this path — best to be clear about that from the beginning.